Jigsaw Assignment 104
Lesson Plan:
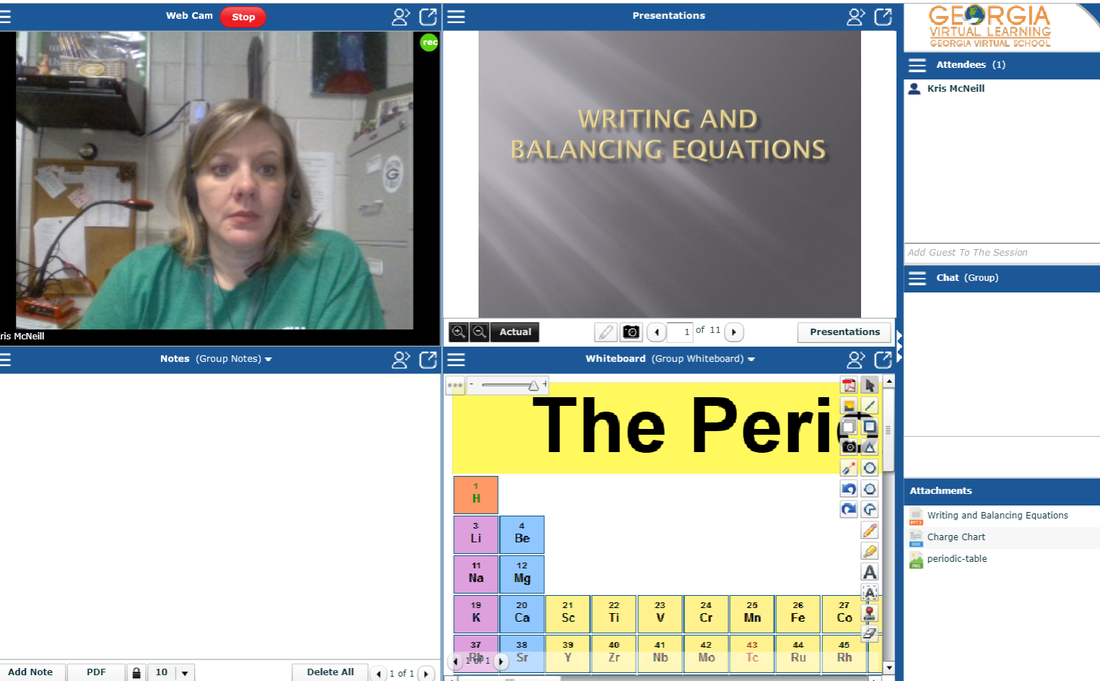
- Start with the webcam, just to say hi!
- Remind students that the links are in Pane 4. They can download the presentation and print it if they wish to follow along on paper.
- Do presentation from Pane 2.
- Pull up image of periodic table in Pane 4 as needed. (Load image in pane 3 and push to Pane 4).
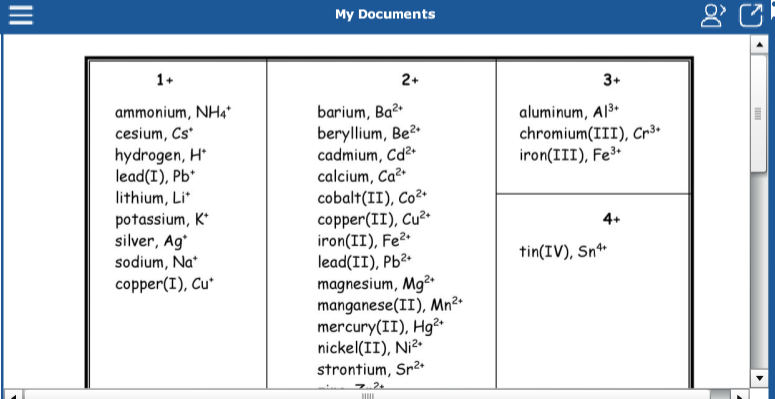
- Pull up document of charge chart in Pane 4 as needed.
Recording:
Watch a portion of my lesson below or at the link: stream.jigsawme.com/u/VkqbFX
Watch a portion of my lesson below or at the link: stream.jigsawme.com/u/VkqbFX
Reflection:
I had forgotten that even though images are loaded in Pane 3, if you want to annotate them, you must push them through to the whiteboard in Pane 4. This was actually helpful because it allowed me to annotate on the image of the periodic table. the first time I referenced an image from Pane 3 when I clicked on the image it showed large for me. But, when I watched the recording back, you couldn't see the image I was pointing to. So, I learned that you have to push it through to the whiteboard. I will start thinking of Pane 3 as just a file cabinet for the images, but won't use them directly from there.
When I watched my practice video back, I did notice that you can't see the document I was referring to at the end (charge chart). Instead, it showed the image I put in Pane 4 (the periodic table). I'm not sure why I could see it as I was doing the lesson but the students couldn't see it in the recording. I will have to continue to play with this. I already know an easy work around would be to save the document as an image and load it into Pane 3.
After this training, I am far more comfortable with Jigsaw. The annotating features are much smoother than they were in Adobe Connect. The use of the specific Panes was a learning curve, for sure. But, now that I understand what each is used for, it's pretty easy.
I want to say that I loved how Mary Ellen did an actual lesson in this session. Often our meetings are very different than a session that we would do with our students. By Mary Ellen doing a lesson (a useful one at that) with us, she modeled perfectly exactly what a lesson should look like!!
|
